Skip to product information
1 of 1

Sculpey Premo™ Carnation Spring Bangle Bracelet

Sculpey Premo™ Carnation Spring Bangle Bracelet

Designed by @wild_encanto / Erica Gamboa
Read More
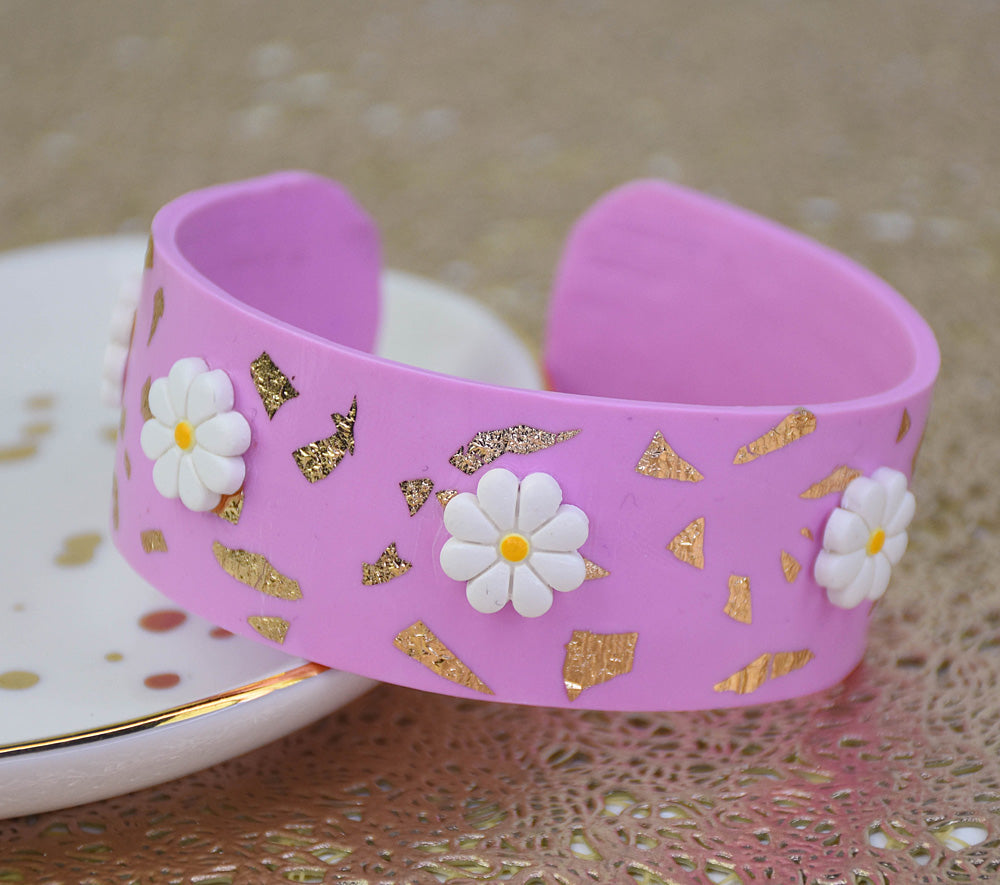
Spring into Spring with this lovely Sculpey Premo™ Carnation bracelet featuring little flowers. This delicate but cheerful clay color is a perfect little pop of color for the background. TIME TO COMPLETION: 30 minutes to make 30 Minutes to bake
Read Less
ADDITIONAL SUPPLIES
  • 0.5” or 0.75” Daisy Cutter from Etsy
  • Yellow acrylic paint
  • Gold foil from Amazon
  • Paintbrush
  • Ruler
View full details
Project Instructions

Step 1

Getting Started:

Please make sure your work area is covered and you are not working on an unprotected surface. We recommend working on the Sculpey® Oven-Safe Work Mat, wax paper, metal baking sheet, or disposable foil. Uncured clay may damage unprotected furniture or finished surfaces. Be sure to cover your crafting area appropriately.

Start with clean hands, unwrap and knead clay until soft and smooth, or condition by running clay though a Pasta Machine. We recommend using a designated machine for clay purposes only. When working with multiple colors, clean hands with soap and water or baby wipes (we have found that baby wipes work best) before switching colors. Shape clay, pressing pieces firmly together. Wash hands after use.

Baking (also called Curing):

Begin by preheating oven to 275 °F (130 °C). After you are done creating; for best results bake/cure clay on an oven-proof surface such metal, aluminum foil, an index card or the Sculpey® Clay Mat at 275°F (130 °C) for 30 minutes per 1/4" (6
mm) thickness according to package directions. Oven safe glass or ceramic
surfaces are also acceptable for baking/curing; however please note that the
baking/curing times may take longer as the glass or ceramic surfaces take
longer to heat up. For best baking results, use an oven thermometer. DO NOT USE
MICROWAVE OVEN. DO NOT EXCEED THE ABOVE TEMPERATURE OR RECOMMENDED BAKING TIME.

Step 2

Cut half of the Carnation bar and begin to work through your conditioning machine on the thickest setting. Fold in half and run through your conditioning machine a few times to make sure the clay is conditioned and ready to work with. On the final run through, roll out the clay to a long and narrow strip.

Cut 1/4 of the Sculpey Soufflé Igloo and roll through your conditioning machine on
the second thickest setting. After these pieces are conditioned, place them to
the side to use later.

*Be sure to wipe down your conditioning machine between colors to avoid contamination of the previous color.

Step 3

Using your ruler, measure out and cut a long narrow strip at least 1” wide and 6.5-7” in length with your tissue blade tool.

Step 4

For the ends of the bracelet, you can smooth them out and keep the general shape or you can round them out with a blade. For this demo, I will be rounding them out. You can smooth out the edges with your fingertips, being careful not to misshape
too much.

Step 5

Here is the fun part… Let’s decorate!

Starting with the gold foil. You can pull small pieces and rub onto the clay to add gold accents to the bracelet base.

Step 6

Using the Sculpey Soufflé Igloo that was set aside earlier, cut floral accents using your 0.5” or 0.75” flower cutter. Dip your cutter into cornstarch or a wet sponge before pressing into the clay to avoid getting the clay stuck in the cutter. For this
bracelet I have cut 5 flowers to add to the bracelet.

Using a small dot of the Sculpey Translucent Liquid Clay on the back of each flower, place them on the bracelet wherever you see fit.

Optional: Using the yellow acrylic paint and a small ball point tool, place a small dot in the center of the flower to add a little accent to the flower.

Step 7

Using your tissue blade, slowly and carefully run it along under the clay strip to pull it away from your surface.

Use a round metal or ceramic form to wrap the bangle around to bake and get that round form needed. Remember to leave a small gap at the ends to make sure that you can slip onto your hand. Place in the pre-heated oven and bake as directed per packaging directions.

Remember to let your bracelet cool completely before removing from the form.

Step 8

Once bracelet is completely cool, apply a thin coat of Sculpey Gloss Glaze to add a
glossy seal to your bracelet. Apply 2-3 coats and follow directions as listed
on bottle.

Step 9

Enjoy your new bracelet and pair it with a fresh spring outfit!